Profiles and Layers
A road's cross-section is built from layers, placed side by side across the road. Each layer has a profile that gives it its shape.
For example, a simple street might have: sidewalk, curb, two lanes, curb, sidewalk.
Road Profiles
A Road Profile is an asset holding a 2D shape: the outline of a curb, a sidewalk or a lane surface. Create one from Assets > Create > World Toolkit > Roads > Profile, or click New next to a layer's Profile field to save a new one and assign it.
Editing the shape
Select the profile asset to edit its points in the Profile Points graph:
- Click a point or span to select it, and drag points to move them. Esc during a drag cancels the move.
- Double-click a span to insert a point. Del removes the selected point.
- Middle-drag pans, scroll zooms, F frames the shape.
Add Point, Remove Point and Frame do the same from buttons.
For the selected point:
- Position
- The exact coordinates.
- Shading
- Hard gives a sharp edge at this point instead of a smooth one.
For the selected span (the segment between two points):
- Span Material
- A material for this part only. Leave it empty to use the profile's Default Material.
The Profile Preview at the bottom of the inspector shows the result in 3D. Corner previews it around a corner, the number next to it is the preview length in meters, and Iso, Wire and Reset change the view.
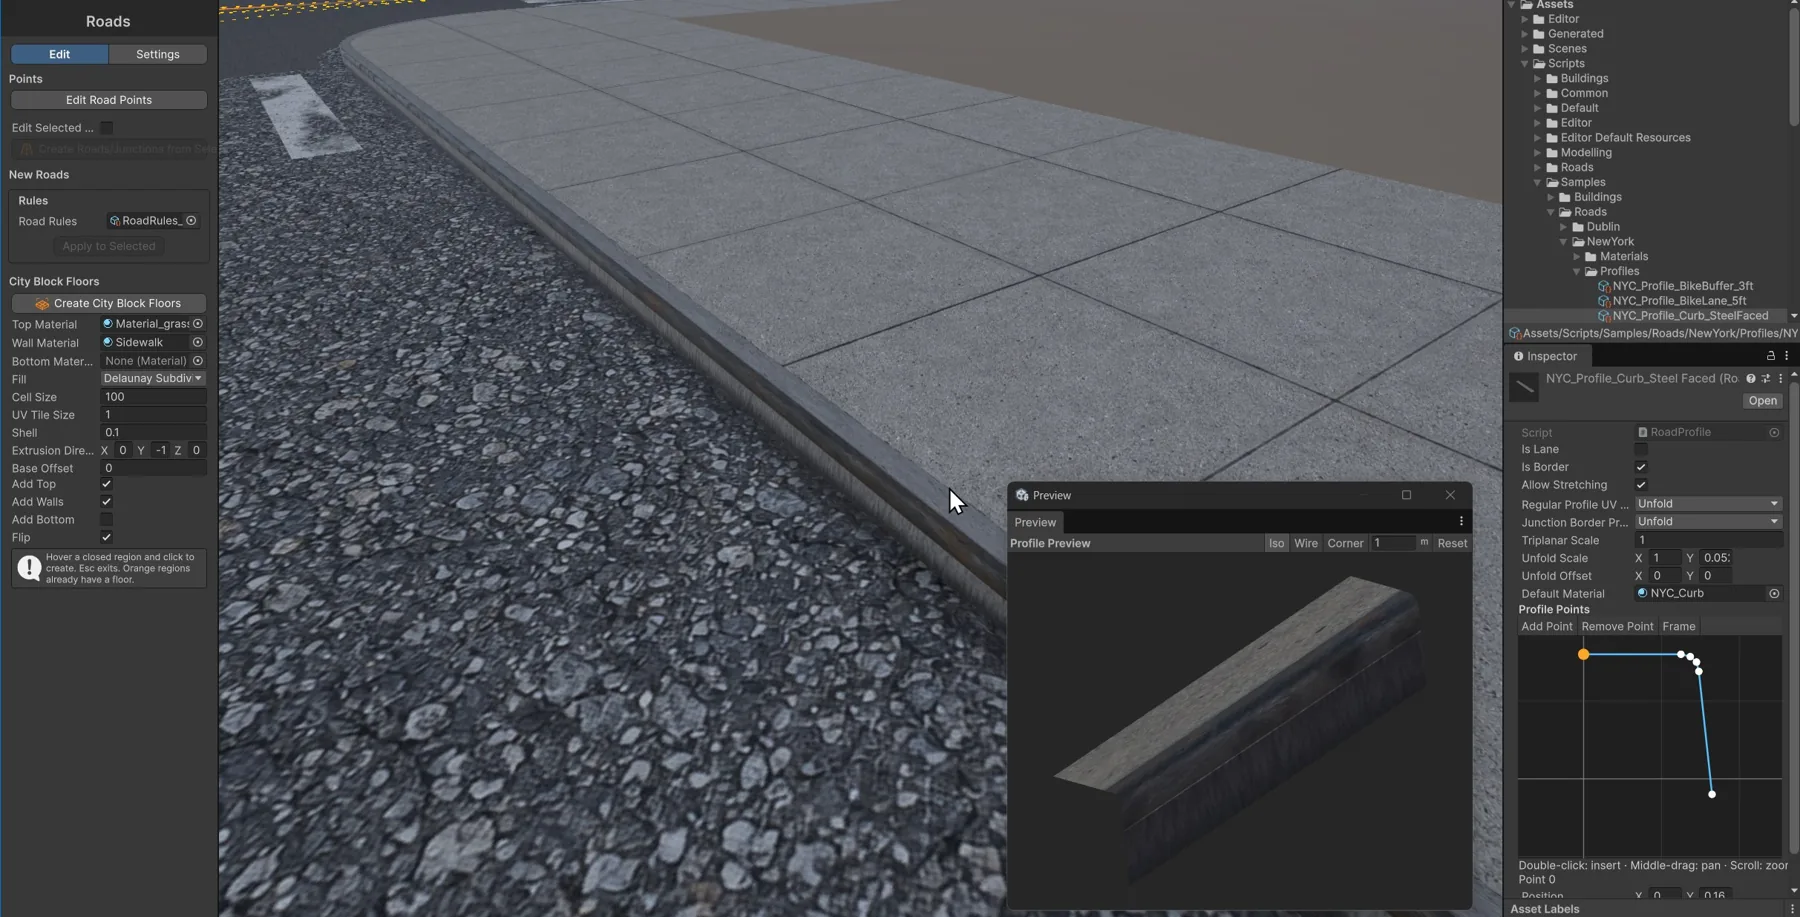
Profile settings
- Is Lane
- Marks the profile as a driving lane. Lanes have a direction and show lane guides. A layer's lane settings (Lane Direction, Extra Lane Count and Lane Divisions) only work with lane profiles, and are greyed out for other profiles.
- Is Border
- Marks the profile as a road border (curb, gutter, sidewalk). Junctions treat borders differently from the road surface: borders continue around the corners between roads.
- Regular Profile UV Type and Junction Border Profile UV Type
- How textures are mapped: along roads, and for border profiles inside junctions. Unfold follows the profile along the road, with Unfold Scale and Unfold Offset. Triplanar projects the texture in world space, with Triplanar Scale.
- Default Material
- The material used for spans with no material of their own.
Layers
Layers are set on the road component, under Road Layer Groups, or in the Groups of a Road Rules asset.
- Name and Profile
- The layer's name and its Road Profile.
- Alignment and Offset
- Where the layer sits: Left, Center or Right, then shifted by Offset.
- Mirror
- Flips the profile, to use the same curb asset on both sides of the road.
- Width Multiplier
- Scales the layer's width.
- Lateral Bulge
- A curve that raises the layer across its width, for a crowned road that sheds water. The X axis goes from 0 at the left edge to 1 at the right edge, and the Y axis is the extra height.
- Spline Ranges
- Limits the layer to parts of the road. Leave it empty to use the whole length. See Spline ranges.
- Sub Layers
- Layers placed relative to this one and painted over it, such as a line on a lane or a no-parking line in a gutter.
- Extend Into Junctions
- Sub layers only. Continues the sub layer over the junction lead-in, up to where the curb arcs start, instead of stopping where the road surface is cut. Meant for markings painted on the road. A marking that sits inside a border profile, like a gutter line, follows the border around the junction corner. See Markings in junctions.
Lanes
For lane layers (layers whose profile has Lane enabled; for other profiles, these fields are greyed out in the inspector):
- Lane Direction
- Forward, Backward or Both.
- Extra Lane Count
- Adds more lanes of the same profile next to this one.
- Lane Divisions
-
Dividers between lanes, each with its own Profile:
- Directions sets which lanes they separate: Any, Same Direction or Opposite Directions.
- Placement decides whether the divider opens a gap between lanes (Open Gap) or sits on the seam between them (On Seam).
- Width Multiplier, Mirror and Offset size and place the divider.
- Conform To Surface makes the divider follow the lane surface below it (its bulge and profile shape) instead of spanning it as a straight strip. Offset Y then lifts it above that surface.
- Extend Into Junctions continues the divider over the junction lead-in, up to where the curb arcs start.
- Spline Ranges limit the divider to parts of the road. Outside them, the divider and its gap are removed.
You can also edit lanes in the Scene view. Select a road to show its lane controls:
- Click a lane's arrow to switch its direction between Forward, Backward and Both. On an extra lane, the arrow flips that lane's direction.
- Click the + button to add an extra lane, or the − button on an extra lane to remove one.
Warning
On a road that references Road Rules, these lane edits change the rules asset, and so every road that uses it. To change one road only, turn on that lane's Lane Overrides in the road inspector first.
Spline ranges
Layers, sub layers, lane divisions and layer groups can be limited to parts of the road with Spline Ranges. With an empty list they apply everywhere. Each range has an Anchor:
| Anchor | What it covers |
|---|---|
| Spline | One Range on the spline path chosen by Spline Path Index. |
| Junction Mouths | One interval at every junction mouth of every spline path, measured from the mouth's curb line back along the road: it starts Mouth Setback from that line and runs for Mouth Length. |
Enable Flip on a range to use everything except that part. Normal ranges add up, and flipped ranges each remove their part.
Use spline ranges for a sidewalk that only exists on one block, or a parking lane that stops before a corner.
Crossings and stop lines
Give a sub layer a Junction Mouths range to paint it at every junction the road reaches. Sub layers whose ranges are all unflipped Junction Mouths ranges are laid out straight along the lanes at the mouth, square to them, even where the road curves.
Layer Groups
Layers are organized in groups: the road's Road Layer Groups, or the Groups of a Road Rules asset.
- Group Id
- The group's name, used by the settings below.
- Override Group Ids
- Groups this one replaces. Wherever this group is active, along its Spline Ranges, the groups listed here are turned off.
- Alignment On Anchor Group and Anchor Group Id
- Center centers the group on the road. Left Of Group lines up the group's left edge with the left edge of the group named in Anchor Group Id, and Right Of Group lines up the right edges.
- Offset
- Shifts the whole group sideways (X) and up (Y).
- Ignore Junctions
- Leaves the group out of junction generation.
- Spline Ranges and Layers
- Where the group applies (see Spline ranges), and its layers.
Default mesh
When none of a road's layers has a profile, the road uses its Default Mesh: a strip with a Material, flat or shaped across its width by Profile Curve, with Lateral Segments across and a Longitudinal Segment Length along. With Follow Spline Width, its width comes from the spline's width data, falling back to Width where there's none.
Position Jitter and Jitter Seed add a small, repeatable random displacement, for a worn, uneven look. Road ends and junction mouths stay fixed.
On a road that references Road Rules, the default mesh comes from the rules.
Road materials
World Toolkit includes two shaders for road materials, for the Universal Render Pipeline. Pick them in a material's shader menu, under WorldToolkit > Roads.
- Lane Wear Lit
- Asphalt with procedural tire wear. Albedo (Triplanar), Normal Map (Triplanar) and Mask Map are projected in world space (Tiling Per Metre, Blend Sharpness), so the texture lines up across roads and junctions. The Wear settings tint the wheel tracks with rubber (Rubber Tint, Rubber Strength, Rubber Smoothness) and oil (Oil Tint, Oil Strength), broken up by Breakup Scale and Breakup Amount. On roads, the tracks follow each lane (Lane Tracks On Roads; Track Gauge, Track Width, Track Softness and Oil Width are fractions of the lane width). In junctions, they follow the lane guides through the junction.
- Road Marking Lit
- Paint for markings: lane dividers, crossings and junction markings. Its Depth Bias (Slope Factor and Units) draws the paint over the asphalt without flickering, even where it's level with the road. Alpha Clip cuts out the parts below Alpha Cutoff.
Both take a Mask Map with metallic in R, occlusion in G and smoothness in A.